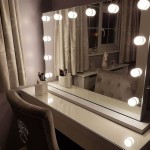
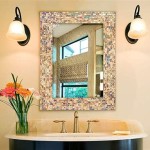
Installing Trim Around a Bathroom Mirror: A Step-by-Step Guide
Adding trim around a bathroom mirror can dramatically enhance its aesthetic appeal and elevate the overall bathroom design. Trim acts as a visual frame, drawing attention to the mirror and adding a touch of elegance and sophistication. This guide will provide a step-by-step breakdown of the process, equipping you with the knowledge and skills to successfully install trim around your bathroom mirror.
Step 1: Gather Your Materials and Tools
Before embarking on the installation process, ensure you have gathered all the necessary materials and tools. The specific requirements may vary based on the type of trim you choose, but generally, you will need:
- Trim: Choose a material that complements your bathroom's aesthetic, such as wood, MDF, or PVC. Consider the size and style of the trim to match the mirror and bathroom decor.
- Miter saw or miter box and hand saw: To make precise cuts at 45-degree angles, ensuring a clean and professional finish.
- Measuring tape: For precise measurements of the mirror and the trim pieces.
- Pencil: For marking the trim pieces and outlining cutting lines.
- Level: To ensure the trim is installed straight and level.
- Caulk: For filling any gaps or seams between the trim and the wall or mirror.
- Caulk gun: To apply the caulk smoothly and efficiently.
- Finishing nails or brads: To secure the trim to the wall.
- Nail gun (optional): For faster and more secure nailing.
- Hammer: To drive in the nails if using manual nailing.
- Wood glue (optional): For added strength and stability.
- Sandpaper (optional): For smoothing out any rough edges or imperfections.
- Paint or stain (optional): To match the trim to the existing bathroom decor or create a desired look.
Step 2: Measure and Cut the Trim
Precise and accurate measurements are crucial for a successful installation. Start by measuring the dimensions of your bathroom mirror. Next, determine the width of the trim you have chosen. Add the width of the trim to each side of the mirror's dimensions to calculate the overall length of the trim pieces needed for the top and bottom. Remember to account for any corners or angles in your measurement.
Once you have determined the lengths for the top and bottom trim pieces, cut them using a miter saw or miter box and hand saw, ensuring 45-degree angles for the corners. To create the side trim pieces, measure the height of the mirror and add the width of the trim. Cut the side pieces using the miter saw or miter box and hand saw, ensuring 45-degree angles for the corners.
Step 3: Prepare the Surface
Before installing the trim, ensure the surface is clean and free of any debris or dust. Use a damp cloth to wipe down the wall surface and the back of the mirror. If necessary, use a light sandpaper to smooth out any rough edges, imperfections, or prior adhesive residue.
Step 4: Install the Trim
Start by placing the top and bottom trim pieces in position, ensuring they are level and flush with the mirror. Use a pencil to mark the nail locations for each piece. If using a nail gun, pre-drill pilot holes before attaching the trim. If using a hammer and nails, drive the nails at a slight angle for better holding power and to avoid damaging the surrounding surface.
Next, position the side trim pieces, ensuring they are flush with the top and bottom pieces. Use a level to check for straightness and mark the nail locations. Secure the side trim pieces using the same method as for the top and bottom pieces. Ensure that all the trim pieces are firmly attached and flush against the wall.
Step 5: Apply Caulk and Finish
Once all the trim pieces are in place, apply a thin bead of caulk to any gaps or seams between the trim and the wall or mirror. Use a caulk gun to apply the caulk smoothly and evenly. Use a damp finger or a caulk tool to smooth out the caulk and remove any excess. Allow the caulk to dry completely before proceeding to the next step.
If you have chosen to paint or stain the trim, apply the desired color to the trim pieces. Carefully follow the instructions on the paint or stain product to achieve the desired finish. Allow the paint or stain to dry completely before handling the trim.

Easy Diy Tutorial Adding Trim Around A Giant Mirror For Ers

How To Frame Out That Builder Basic Bathroom Mirror For 20 Or Less

The Kids Bathroom Mirror Gets Framed House Of Hepworths

Diy Bathroom Mirror Frame With Molding The Happier Homemaker

How To Frame A Mirror

Easy Diy Tutorial Adding Trim Around A Giant Mirror For Ers

How To Frame A Bathroom Mirror

How To Frame A Bathroom Mirror

How To Frame Out That Builder Basic Bathroom Mirror For 20 Or Less

Mirror Frame Diy How To Update A Basic Bathroom Our Faux Farmhouse