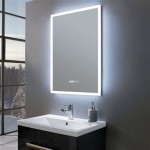
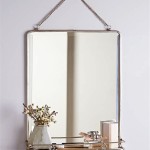
How to Make a Frame for a Bathroom Mirror
Adding a frame to a bathroom mirror is a simple yet effective way to elevate the room's aesthetic. A custom frame can add personality and style, transforming a plain mirror into a focal point. This article outlines the process of crafting a frame for a bathroom mirror, detailing material choices, construction techniques, and installation steps.
Choosing the Right Materials
Material selection is crucial, especially in a moisture-prone environment like a bathroom. The frame material must withstand humidity and temperature fluctuations without warping or deteriorating.
- Moisture-Resistant Wood: Cedar, redwood, and teak are excellent choices due to their inherent resistance to moisture and decay. Treated lumber is a more budget-friendly option.
- Polyurethane Molding: This synthetic material offers a lightweight, water-resistant alternative to wood. It's available in various profiles and can be easily cut and shaped.
- PVC Trim: Another waterproof option, PVC trim is durable and low-maintenance. It’s available in a range of styles and finishes.
- Composite Materials: These materials combine the benefits of different materials, offering superior durability and moisture resistance.
Taking Accurate Measurements
Precise measurements are essential for a well-fitting frame. Inaccurate measurements will result in gaps or overlaps, compromising the frame’s appearance and functionality.
- Measure the Mirror: Use a tape measure to determine the exact width and height of the mirror.
- Account for Frame Width: Add the desired frame width to the mirror dimensions. This determines the overall dimensions of the frame pieces.
- Double-Check Measurements: Verify all measurements before cutting any materials to avoid costly mistakes.
Cutting and Assembling the Frame
Once the materials are chosen and measured, the next step involves cutting and assembling the frame pieces. Precision and careful handling are key during this phase.
- Cutting the Frame Pieces: Use a miter saw to cut the frame material at 45-degree angles. This ensures tight, seamless joints at the corners.
- Joining the Frame Pieces: Wood glue and wood screws or finishing nails can be used to secure the frame pieces together. Clamps are helpful for holding the pieces in place while the glue dries.
- Reinforcing the Joints: Consider using wood glue and corner brackets for added strength and stability, especially for larger frames.
Finishing the Frame
The finishing process protects the frame from moisture and enhances its appearance. Several options are available, depending on the chosen material and desired aesthetic.
- Sanding: Sand the frame surface smooth to remove any imperfections or rough edges.
- Priming: Apply a primer, especially to wood frames, to ensure even paint adhesion and prevent moisture penetration.
- Painting or Staining: Choose a paint or stain that complements the bathroom décor and offers moisture resistance. Several coats may be required for optimal coverage and protection.
- Sealing: Apply a sealant designed for bathrooms to provide an extra layer of protection against moisture and humidity.
Installing the Frame
The final step is installing the frame onto the mirror. Several methods can be employed depending on the frame's weight and the wall's construction.
- Liquid Nails or Construction Adhesive: This method is suitable for lightweight frames. Apply adhesive to the back of the frame and press it firmly against the mirror.
- Mirror Clips: These clips hold the frame in place while allowing for some movement. They are a good option for heavier frames or uneven walls.
- Cleats and Brackets: This method offers greater stability for larger, heavier frames. Install cleats on the wall and corresponding brackets on the frame.
- Consider the Wall Type: Different wall types, like drywall or tile, may require specific fasteners and installation techniques. Consult a professional if needed.
Adding Decorative Elements (Optional)
Once the frame is installed, decorative elements can be added to further personalize the mirror. These elements can enhance the overall aesthetic and tie the mirror into the bathroom's design theme.
- Trim Molding: Add smaller trim pieces to create intricate designs or add depth to the frame.
- Tiles or Mosaic: Incorporate tiles or mosaic pieces into the frame for a unique and artistic touch.
- Decorative Hardware: Consider adding decorative knobs or pulls to the frame for visual interest and functionality.

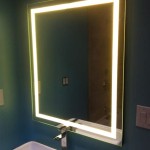
Mirror Frame Diy How To Update A Basic Bathroom Our Faux Farmhouse

Mirror Frame Diy How To Update A Basic Bathroom Our Faux Farmhouse

How To Make An Easy Diy Bathroom Mirror Frame Momhomeguide Com

Diy Bathroom Mirror Frame For Under 10 O Hayley Blog

Mirror Frame Diy How To Update A Basic Bathroom Our Faux Farmhouse

How To Make A Diy Bathroom Mirror Frame Thediyplan

Diy Bathroom Mirror Frame For Under 10 O Hayley Blog

Mirror Frame Diy How To Update A Basic Bathroom Our Faux Farmhouse

Diy Stick On Mirror Frame Sawdust Sisters

Diy Wood Framed Bathroom Mirror Christina Maria Blog