Make Frame For Mirror
Creating a custom frame for a mirror elevates its aesthetic appeal and adds a personalized touch to any space. Whether seeking a rustic, modern, or ornate design, building a frame is a rewarding project accessible to varying skill levels. This article outlines the process, covering material selection, measurement, construction, and finishing techniques.
Choosing the Right Materials
Material selection hinges on the desired aesthetic, budget, and the mirror's location. Consider the following factors:
- Wood: A classic choice, offering versatility in terms of style and finish. Different wood species, such as pine, oak, and maple, provide varying grain patterns and durability.
- MDF (Medium-Density Fiberboard): A cost-effective option, ideal for painted finishes. MDF provides a smooth, consistent surface, but requires proper sealing to prevent moisture damage, particularly in bathrooms.
- Metal: Aluminum or steel can create sleek, modern frames. These materials require specialized cutting and joining techniques, such as welding or metal adhesives.
- Polyurethane Molding: Lightweight and easy to work with, polyurethane molding offers intricate designs and can be painted or stained to mimic wood.
- Repurposed Materials: Reclaimed wood, old picture frames, or even driftwood can be creatively incorporated for a unique, eco-friendly frame.
Accurate Measurement is Crucial
Precise measurements are essential for a well-fitting frame. Follow these steps for accurate measurements:
- Measure the Mirror: Accurately measure the length and width of the mirror, recording the dimensions in a notebook.
- Determine Frame Width: Decide on the desired width of the frame, considering the overall proportions and the mirror's size.
- Calculate Material Lengths: Add twice the frame width to both the length and width of the mirror to determine the required length of each frame piece.
- Double-Check: Verify all measurements before cutting any materials to avoid costly mistakes.
Constructing the Frame
Building the frame involves cutting, joining, and securing the chosen material. The following steps outline the general process:
- Cutting the Material: Using appropriate tools, like a miter saw for wood or a metal saw for metal, carefully cut the frame pieces to the calculated lengths at 45-degree angles for mitered corners.
- Joining the Pieces: Wood frames can be joined using wood glue and clamps, reinforced with nails or screws. Metal frames may require welding or specialized adhesives. Polyurethane molding often utilizes miter joints secured with adhesive.
- Creating a Lip or Rebate: A lip or rebate on the back inner edge of the frame provides a secure seat for the mirror. This can be achieved using a router or table saw, depending on the material.
- Securing the Mirror: Once the frame is assembled, the mirror can be placed within the rebate and secured using mirror clips, adhesive, or a backing board.
Finishing Techniques Enhance the Appearance
The finishing process adds protection and enhances the frame's aesthetic. Consider the following options:
- Sanding: Sanding smooths the frame surface, preparing it for painting or staining. Start with coarser grit sandpaper and progressively move to finer grits for a smooth finish.
- Priming (for painted finishes): Primer ensures better paint adhesion and provides a uniform base coat.
- Painting: Apply paint in thin, even coats, allowing each coat to dry completely before applying the next. Multiple coats may be necessary for optimal coverage.
- Staining (for wood): Stain enhances the natural wood grain and provides color. Apply stain evenly, following the manufacturer's instructions.
- Sealing: A sealant protects the frame from moisture and wear. Choose a sealant appropriate for the material and intended environment.
Adding Decorative Elements (Optional)
Consider adding decorative elements to further personalize the frame. These additions can range from simple to intricate depending on personal preference:
- Carving: Wood frames can be carved with intricate designs using chisels and gouges.
- Gilding: Applying gold leaf or metallic paint creates a luxurious finish.
- Inlay: Inserting contrasting materials, such as mother-of-pearl or metal, adds visual interest.
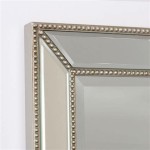
- Beading: Applying decorative beads or trim along the frame's edge adds texture and detail.
Mounting the Framed Mirror
Secure mounting is important for safety and stability. Select appropriate hardware based on the frame's weight and the wall's construction:
- D-Rings and Wire: This common method is suitable for lighter frames. Ensure the wire is strong enough to support the weight.
- French Cleats: These interlocking brackets provide a strong, secure mounting solution for heavier frames.
- Mirror Adhesive: For lighter mirrors in non-humid environments, specialized mirror adhesive can be used for direct mounting to the wall.

How To Make A Diy Bathroom Mirror Frame Thediyplan

Iheart Organizing Diy Wood Framed Mirror

20 Fantastic Diy Mirror Frame Ideas A Cultivated Nest

Diy Framed Mirror Jaime Costiglio

Framed Floor Mirror Love Grows Wild

30 Diy Mirror Frames Scratch And Stitch

How To Build A Mirror Frame Sunshine And Rainy Days

How To Make A Simple Mirror Frame With Wood Upgrade An Old

Diy Bathroom Mirror Frame For Under 10 O Hayley Blog

Diy Stick On Mirror Frame Sawdust Sisters

