Making a Frame for a Bathroom Mirror
Framing a bathroom mirror elevates its appearance, adding a touch of custom design and completing the room's aesthetic. This project offers an opportunity to integrate various materials and styles, matching the frame to the overall bathroom decor. Whether aiming for a rustic, modern, or traditional look, building a mirror frame is an achievable DIY project with the right tools and approach.
Before beginning, accurate measurements are crucial. Using a tape measure, carefully determine the mirror's dimensions. Add desired frame width to these measurements to calculate the final frame dimensions. Record these figures precisely to avoid cutting errors later.
Material selection significantly impacts the frame's final look and durability. Wood offers classic appeal and versatility, suitable for various finishes. Popular choices include oak, pine, and maple. Moisture-resistant options like cedar or teak are especially well-suited for bathroom environments. Alternatively, composite materials like MDF (medium-density fiberboard) provide a smooth, paintable surface at a lower cost. For a more contemporary feel, metal or plastic moldings can be considered.
Once the material is chosen, acquire the necessary tools. Essential items include a miter saw (or hand saw with a miter box), wood glue, a nail gun or hammer and finishing nails, sandpaper, safety glasses, and a measuring tape. Additional tools, such as clamps and a wood filler, can further simplify the process.
The next step involves cutting the frame pieces. Using the previously recorded dimensions and the miter saw (or hand saw and miter box), cut the frame material at 45-degree angles. These angled cuts, known as miter joints, will create clean, professional-looking corners when assembled. Ensure precise cuts to guarantee a tight fit.
After cutting, it's time to assemble the frame. Apply wood glue to the mitered edges of each piece. Then, carefully join the pieces, forming a rectangular frame. Secure the corners with finishing nails using a nail gun or hammer. Clamps can be used to hold the frame together while the glue dries, ensuring a strong bond.
Once the glue has dried, imperfections or nail holes can be filled with wood filler. After the filler dries, sand the entire frame smooth using progressively finer grits of sandpaper. This preparation is essential for achieving a professional finish.
The finishing process significantly impacts the frame’s appearance and longevity, especially in a humid bathroom environment. Painting is a common choice, offering a wide range of colors and finishes. Priming the frame before painting ensures better paint adhesion and a more uniform finish. Alternatively, staining allows the natural wood grain to show through while adding color and protection. Multiple coats of sealant, particularly a moisture-resistant variety, are recommended for enhanced durability in the bathroom.
Attaching the frame to the mirror requires careful consideration. One method involves using mirror adhesive, applying it to the back of the frame and then carefully adhering it to the mirror's edge. Another approach uses clips or brackets that are attached to the back of the frame and then secured to the wall, holding the mirror in place. Ensure the chosen method provides secure and stable mounting.
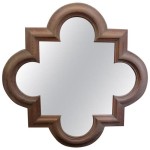
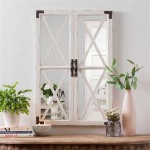
Different frame styles can be explored to create unique looks. A simple, flat frame offers a clean, minimalist aesthetic. More ornate profiles, with decorative carvings or moldings, can add a touch of elegance. Consider incorporating contrasting materials or adding embellishments like tiles or mosaics for a personalized design.
Properly sealing the frame edges is essential, especially in bathrooms, to prevent moisture damage. Apply a bead of sealant along the inside edge of the frame, where it contacts the mirror. This will prevent water from seeping between the mirror and the frame, protecting the frame material and the mirror's silvering.
Lighting can further enhance the framed mirror. Consider installing wall sconces on either side of the mirror or incorporating integrated LED lighting within the frame itself. This adds both functionality and ambiance to the bathroom.
Maintaining the framed mirror is straightforward. Regularly wipe the frame with a damp cloth to remove dust and moisture. Avoid using harsh chemicals that could damage the finish. Periodically inspect the sealant and reapply if necessary to ensure continued protection against moisture.

Mirror Frame Diy How To Update A Basic Bathroom Our Faux Farmhouse

Mirror Frame Diy How To Update A Basic Bathroom Our Faux Farmhouse

How To Frame A Mirror

Mirror Frame Diy How To Update A Basic Bathroom Our Faux Farmhouse

How To Make An Easy Diy Bathroom Mirror Frame Momhomeguide Com

Diy Bathroom Mirror Frame With Molding The Happier Homemaker

Diy Bathroom Mirror Frame For Under 10 O Hayley Blog

Diy Bathroom Mirror Frame For Under 10 O Hayley Blog

How To Make An Easy Diy Bathroom Mirror Frame Momhomeguide Com

Mirror Frame Diy How To Update A Basic Bathroom Our Faux Farmhouse