DIY Mirror Cabinet Doors: A Comprehensive Guide
Mirror cabinet doors offer a versatile and visually appealing solution for enhancing spaces. They brighten rooms by reflecting light, create the illusion of spaciousness, and add a touch of modern elegance. Undertaking a DIY project to install mirror cabinet doors can be a cost-effective and satisfying way to personalize living spaces. This article provides a comprehensive guide to crafting and installing mirror cabinet doors, covering essential materials, tools, design considerations, and the step-by-step process.
Planning and Design Considerations
Before embarking on the physical construction phase, meticulous planning and design are paramount. The success of a DIY mirror cabinet door project hinges on accurate measurements, a well-defined design aesthetic, and careful consideration of safety factors.
Accurate Measurements: The initial step involves precisely measuring the existing cabinet frame openings. Measurements should be taken both horizontally and vertically at multiple points to account for any potential irregularities. These measurements will serve as the foundation for determining the exact dimensions of the mirror panels and corresponding frames. Subtract allowance for hinges and hardware required for attachment.
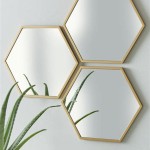
Design Aesthetic: The design of the mirror cabinet doors should complement the overall aesthetic of the room. Consider the frame style, mirror shape, and any decorative elements. Options range from simple, frameless mirrors to ornate, framed mirrors with intricate detailing. The frame material should also be chosen to harmonize with the existing cabinetry and room decor. Common frame materials include wood, metal, and MDF (Medium-Density Fiberboard). Different materials will affect the complexity of construction.
Safety Considerations: Working with mirrors necessitates prioritizing safety. Mirror edges can be sharp and fragile, posing a risk of cuts or breakage. Safety glasses, gloves, and appropriate handling techniques are essential precautions. When cutting or drilling mirrors, specialized tools and techniques are required to prevent shattering. If unfamiliar with these processes, it may be advisable to seek professional assistance.
Mirror Type: The type of mirror used also has a significant impact. Standard mirrors are suitable for most applications, but consider tempered glass for increased safety and durability. Consider the thickness of the mirror glass. Thicker glass is more durable but also heavier, requiring more robust hinges. Antique mirrors offer a more textured and aged look, while tinted mirrors add a subtle color variation. One-way mirrors provide privacy by allowing visibility from one side only. The choice depends on the desired aesthetic and functional requirements.
Materials and Tools Required
Gathering the necessary materials and tools beforehand streamlines the construction process and ensures a smooth workflow. The specific materials and tools will vary depending on the chosen design, but the following list encompasses the essential items for a typical DIY mirror cabinet door project:
Mirror Panels: Cut to the precise dimensions determined during the planning phase. Mirror suppliers can cut mirror panels to custom sizes and provide edge treatments for safety and aesthetics. Ensure the mirror's edges are properly finished to minimize the risk of cuts. Different edge treatments include polishing, beveling, and seaming.
Frame Material: Wood, metal, or MDF for constructing the frame around the mirror. The choice of material depends on the desired aesthetic, durability requirements, and skill level. Wood offers a natural look and is relatively easy to work with, while metal provides a sleek, modern aesthetic. MDF is a cost-effective option that can be easily painted or veneered.
Adhesive: Mirror mastic or construction adhesive specifically designed for bonding mirrors to surfaces. Using the correct adhesive is crucial to prevent damage to the mirror's backing and ensure a strong, long-lasting bond. Avoid using adhesives that contain solvents, as they can damage the mirror's reflective coating. Double-sided mirror tape can also be used to assist in holding the mirror in place while the adhesive cures.
Hardware: Hinges, knobs, or pulls for attaching the doors to the cabinet frame. The type of hinges will depend on the cabinet frame design and the desired door swing. Concealed hinges offer a clean, seamless look, while surface-mounted hinges are easier to install. Knobs and pulls should complement the overall aesthetic of the cabinet doors. Consider the weight of the mirror doors when selecting hinges to ensure they can support the weight without sagging.
Safety Gear: Safety glasses, gloves, and dust mask to protect against cuts, splinters, and dust. Safety glasses are essential when cutting, drilling, or handling mirrors. Gloves protect against sharp edges and splinters, and a dust mask prevents inhalation of dust particles generated during sanding or cutting.
Tools: Measuring tape, pencil, saw (circular saw, miter saw, or hand saw depending on the frame material), drill, screwdriver, sandpaper, clamps, and level. A miter saw is ideal for cutting accurate angles for frame corners. A drill is used for creating pilot holes for screws and installing hinges. Clamps are essential for holding the frame pieces together while the adhesive dries.
Finishing Materials (Optional): Paint, stain, varnish, or sealant for finishing the frame. The choice of finishing material depends on the frame material and the desired aesthetic. Paint offers a wide range of color options, while stain enhances the natural grain of wood. Varnish and sealant protect the frame from moisture and wear.
Step-by-Step Construction Process
The construction process involves several steps, from assembling the frame to installing the mirror panel and attaching the hardware. Each step requires precision and attention to detail to ensure a professional-looking result.
Frame Construction: Cut the frame material to the required dimensions, ensuring accurate angles at the corners. Assemble the frame using wood glue, screws, or nails, depending on the frame material. Clamping the frame pieces together during assembly ensures a strong, secure bond. Allow the adhesive to dry completely before proceeding to the next step. Sand the frame smooth to remove any imperfections and prepare it for finishing.
Finishing the Frame (Optional): Apply paint, stain, varnish, or sealant to the frame, following the manufacturer's instructions. Multiple coats may be necessary to achieve the desired finish. Allow each coat to dry completely before applying the next. Lightly sand between coats to ensure a smooth, even finish.
Installing the Mirror Panel: Apply mirror mastic or construction adhesive to the back of the mirror panel. Carefully position the mirror panel within the frame, ensuring it is centered and aligned. Use clamps to hold the mirror panel in place while the adhesive cures. Allow the adhesive to cure completely according to the manufacturer's instructions. Remove any excess adhesive with a clean cloth.
Attaching Hardware: Install the hinges on the cabinet frame and the mirror door frame, following the manufacturer's instructions. Ensure the hinges are properly aligned to allow the door to swing smoothly. Attach the knobs or pulls to the mirror door. Test the door swing and make any necessary adjustments to the hinges to ensure proper operation.
Final Inspection: Inspect the finished mirror cabinet door for any imperfections or issues. Ensure the mirror panel is securely attached to the frame and the hinges operate smoothly. Clean the mirror surface with a glass cleaner to remove any smudges or fingerprints.
Alternatives to Cutting Mirror Yourself: Several alternatives exist for obtaining mirror panels if DIY mirror cutting is not feasible. Purchasing pre-cut mirror panels from glass and mirror suppliers eliminates the need for specialized tools and skills. These suppliers can cut mirrors to custom sizes and shapes while adding safety features such as polished or beveled edges. Partnering with local glass shops for custom mirror cutting is another option. These professionals possess the expertise and equipment to accurately cut mirrors to specifications and provide valuable advice on mirror types and installation techniques. Using pre-cut mirror tiles and creating a mosaic pattern on the cabinet door can also be a creative alternative. This method simplifies the process and opens up design opportunities.

Diy Fluted Cabinet Doors I M Home

Diy Bathroom Vanity Makeover Nieu Cabinet Doors

Modern Master Bath Remodel Part 4 Barn Door Medicine Cabinet Pneumatic Addict

Diy Bathroom Mirror Storage Case Shanty 2 Chic

Diy Mirrored Cabinet Doors Hunted Interior Mirror Cabinets Furniture Building

Diy Fluted Cabinet Doors I M Home

Designed To Dwell Diy Mirrored Console Cabinet

Diy Sliding Barn Door Bathroom Cabinet Shanty 2 Chic

Diy Fluted Cabinet Doors Jenna Sue Design

Fluted Bathroom Cabinet Refacing Diy At Home With Ashley