Putting Molding Around a Bathroom Mirror
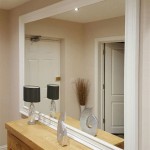
Adding molding around a bathroom mirror is a simple yet effective way to elevate the room's aesthetic. This project can be completed in a few hours and requires minimal tools, making it an ideal weekend DIY endeavor. The addition of molding creates a polished, finished look, adding architectural detail and visual interest to an often-overlooked area.
Choosing the Right Molding
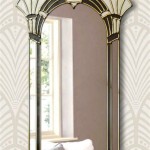
Selecting the appropriate molding profile is crucial for achieving the desired aesthetic. Consider the existing bathroom style – traditional, modern, farmhouse, etc. – and choose a molding profile that complements the overall design. For a traditional bathroom, ornate crown molding or a classic casing profile might be suitable. A modern bathroom might benefit from a sleek, minimalist molding. The size of the mirror and the surrounding wall space should also be considered. A large mirror can accommodate a wider, more substantial molding, while a smaller mirror might benefit from a thinner, more delicate profile.
Necessary Tools and Materials
Before beginning the project, gather all necessary tools and materials. This will streamline the process and prevent interruptions. Essential tools typically include a measuring tape, miter saw (or miter box and hand saw), safety glasses, wood glue, finishing nails, a nail gun (optional but recommended), a hammer, caulk, and paint or stain. Materials include the chosen molding, as well as painter's tape and drop cloths to protect surrounding surfaces.
Measuring and Cutting the Molding
Accurate measurement is crucial for achieving professional-looking results. Measure the length and width of the mirror precisely. Transfer these measurements to the molding, marking where cuts need to be made. For a standard rectangular mirror, four pieces of molding will be required. The ends of the molding pieces should be cut at a 45-degree angle to create mitered joints where the pieces meet at the corners of the mirror. A miter saw provides the most accurate and efficient way to make these angled cuts. If a miter saw is unavailable, a miter box and hand saw can be used, but extra care must be taken to ensure clean, precise cuts.
Attaching the Molding to the Mirror
Once the molding pieces are cut, dry fit them around the mirror to ensure a proper fit. Adjust the angles of the cuts if necessary. Once satisfied with the fit, apply a thin bead of wood glue to the back edges of each molding piece. Carefully position the first piece of molding against the mirror and secure it with finishing nails. If using a nail gun, ensure the nails are driven flush with the surface of the molding. If using a hammer, use a nail set to countersink the nails slightly below the surface. Repeat this process for the remaining molding pieces, ensuring tight, seamless joints at the corners.
Finishing Touches
After the molding is secured, fill any nail holes with wood filler and allow it to dry completely. Next, apply a thin bead of caulk along the seams where the molding meets the mirror and the wall. This creates a waterproof seal and provides a clean, finished look. Smooth the caulk with a damp finger or caulk tool. Once the caulk is dry, the molding can be painted or stained to complement the existing bathroom décor. Use painter's tape to protect the mirror and surrounding walls during painting.
Maintaining the Molding
Maintaining the molding is relatively simple. Regularly clean the molding with a damp cloth to remove dust and grime. Avoid using harsh chemicals that could damage the finish. If the molding is painted, touch-ups can be done as needed to maintain a fresh appearance. If the molding is stained, periodic reapplication of the stain may be necessary to preserve the color and protect the wood.
Addressing Common Challenges
One common challenge when installing molding around a bathroom mirror is dealing with uneven walls. If the walls are not perfectly flat, the molding may not sit flush against the mirror or wall. In this case, shims can be used to fill any gaps and create a level surface. Another challenge can be achieving tight, seamless mitered joints. If the angles of the cuts are not precise, there may be gaps at the corners. Careful measuring and precise cutting are crucial for avoiding this issue. Practicing on scrap pieces of molding can be helpful before cutting the final pieces.
Installing molding around a bathroom mirror offers a significant aesthetic upgrade with minimal effort. By following these steps and paying attention to detail, homeowners can achieve professional-looking results and enhance the overall ambiance of their bathroom.

Easy Diy Tutorial Adding Trim Around A Giant Mirror For Ers

Easy Diy Tutorial Adding Trim Around A Giant Mirror For Ers

How To Frame Out That Builder Basic Bathroom Mirror For 20 Or Less

Diy Bathroom Mirror Frame With Molding The Happier Homemaker

How To Frame A Mirror

The Kids Bathroom Mirror Gets Framed House Of Hepworths

Mirror Frame Diy How To Update A Basic Bathroom Our Faux Farmhouse

Easy Diy Tutorial Adding Trim Around A Giant Mirror For Ers

Diy Stick On Mirror Frame Sawdust Sisters

How To Frame A Bathroom Mirror