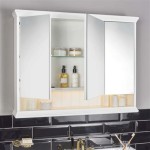
Removing a Glued Mirror from Bathroom Wall Panels to Tiles
Removing a large, glued mirror from bathroom walls, especially when transitioning from panels to tiles, can be a daunting task. This process requires careful planning and execution to minimize damage to the underlying wall and ensure a smooth surface for tiling. This article outlines the steps involved in safely and effectively removing a glued mirror and preparing the wall for tile installation.
1. Assessing the Situation and Gathering Necessary Tools
Before beginning the removal process, it's crucial to assess the type of adhesive used and the condition of the wall panels. Different adhesives require different removal techniques. Common adhesives include construction adhesive, silicone sealant, and mirror mastic. Knowing the adhesive type will help determine the appropriate solvents or removal methods. Additionally, inspecting the wall panels for any existing damage is essential. Removing a glued mirror often damages the panels, making replacement necessary before tiling.
Gather the following tools and materials: Heavy-duty gloves, safety glasses, dust mask, drop cloths, putty knife, razor scraper, heat gun or hair dryer, solvent (if applicable), hammer, pry bar, wooden shims, drywall saw (if necessary), and patching compound.
2. Protecting the Surrounding Area
Protecting the bathroom fixtures and flooring from damage during mirror removal is crucial. Cover the sink, bathtub, toilet, and floor with drop cloths or plastic sheeting. Securing the coverings with painter's tape will prevent them from shifting during the process. This precaution will help contain debris and prevent accidental damage from falling glass or tools. Proper ventilation is also essential; open a window or use a fan to circulate air and minimize exposure to dust and fumes from adhesives or solvents.
3. Weakening the Adhesive
Depending on the adhesive used, applying heat can help soften it and make removal easier. A heat gun or hairdryer can be used to warm the mirror's surface, focusing on small sections at a time. Move the heat source continuously to avoid overheating the mirror or surrounding materials. If using a solvent, carefully apply it to the edges of the mirror, allowing it to penetrate the adhesive. Always follow the manufacturer's instructions for safe solvent handling and application.
4. Carefully Prying the Mirror from the Wall
Once the adhesive is weakened, start gently prying the mirror from the wall. Insert a putty knife or razor scraper behind the mirror, working slowly and carefully to create a gap. Gradually insert wooden shims into the gap to maintain separation and prevent the mirror from re-adhering. Work in small sections, progressively widening the gap and inserting more shims. Applying consistent pressure and avoiding forceful prying will minimize the risk of shattering the mirror.
5. Removing the Remaining Adhesive and Paneling
After removing the mirror, remnants of adhesive and potentially damaged wall panels will likely remain. Use a putty knife or scraper to remove as much adhesive as possible. If the panels are significantly damaged, they will need to be removed. A drywall saw can be used to cut and remove the damaged sections. Ensure the cut edges are clean and straight to facilitate patching and tiling.
6. Preparing the Wall Surface for Tiling
Once the adhesive and damaged panels are removed, the wall surface must be prepared for tiling. Fill any holes or gaps with patching compound, allowing it to dry completely according to the manufacturer's instructions. Sand the patched areas smooth and even with the surrounding wall. Clean the entire wall surface thoroughly to remove dust and debris. A clean, smooth, and level surface is essential for proper tile adhesion and a professional-looking finished product.
7. Applying a Suitable Backer Board (If Necessary)
Depending on the condition of the underlying wall structure after removing the panels, a backer board may be necessary before tiling. Cement board or waterproof drywall provides a stable and moisture-resistant surface for tile installation, particularly in wet areas like bathrooms. Secure the backer board to the wall studs using appropriate screws, ensuring a flush and level surface. Follow the manufacturer’s instructions for proper installation and spacing of screws.
Removing a glued mirror and transitioning to a tiled wall necessitates careful execution and attention to detail. Following these steps will help ensure a smooth and successful renovation.

How To Remove A Bathroom Mirror Lowe S

How To Remove A Bathroom Mirror Lowe S

How To Remove A Bathroom Mirror Lowe S

Remove Glued On Bathroom Mirror With Heat Gun Diy

How Do I Remove Glued On Wall Boards Hometalk

How To Safely Remove Stuck Glued Mirror Bunnings Work Community

Can You Panel Over Tiles Everything Need To Know

How To Remove Glued On Mirrors

How To Stick A Mirror Bathroom Tiles Sanctuary Bathrooms

Fibo Scandinavian Laminate Wall Panelling Tile Effect Light Wood