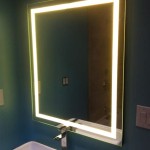
Replacing a Bathroom Mirror Frame
Bathroom mirrors often serve as a focal point, contributing significantly to the room's aesthetics. Over time, mirror frames can deteriorate due to moisture, wear and tear, or simply become outdated. Replacing a bathroom mirror frame can be a relatively straightforward DIY project that dramatically enhances the bathroom's appearance without a complete renovation. This article provides a comprehensive guide to replacing your bathroom mirror frame.
Assessing the Existing Mirror and Frame
Before beginning, carefully examine the existing mirror and frame. This assessment will determine the necessary tools, materials, and approach. Key factors to consider include:
* The frame's attachment method: Is it glued, clipped, or screwed to the mirror? * The mirror's condition: Is it chipped, cracked, or otherwise damaged? * The wall's condition: Is the wall behind the mirror in good repair? * The desired new frame style: Will the new frame fit the existing mirror dimensions? * Plumbing and electrical fixtures: Are there any obstacles, such as pipes or light fixtures, near the mirror? * The weight of the mirror: Larger, heavier mirrors may require additional support. * The type of wall: Drywall, plaster, or tile will influence the installation process.Gathering Necessary Tools and Materials
Having the necessary tools and materials readily available streamlines the replacement process. Essential items typically include:
* Screwdrivers (Phillips and flathead) * Putty knife or pry bar * Measuring tape * Safety glasses * Work gloves * New mirror frame * Mirror adhesive (if required) * Construction adhesive (if required) * Shims * Level * Pencil * Caulk * Caulk gunRemoving the Old Frame
The removal process varies depending on how the old frame is attached. Exercise caution to avoid damaging the mirror. Consider these steps:
* If the frame is glued, carefully use a putty knife or pry bar to separate it from the mirror. Applying heat with a hairdryer can soften the adhesive. * If the frame is clipped, locate the clips and gently pry them open to release the frame. * If the frame is screwed, remove the screws using the appropriate screwdriver.Preparing the Mirror and Wall
Once the old frame is removed, prepare the mirror and wall for the new frame. This includes:
* Cleaning the mirror edges thoroughly to remove any residual adhesive or debris. * Inspecting the wall for any damage and repairing it as necessary. * Ensuring the wall is clean and dry.Installing the New Frame
Installation methods vary depending on the type of new frame. Follow the manufacturer's instructions carefully. General steps may include:
* Dry fitting the new frame around the mirror to ensure a proper fit. * Applying mirror adhesive or construction adhesive to the back of the frame, if required. * Carefully positioning the new frame around the mirror. * Securing the frame to the wall or mirror using appropriate fasteners, clips, or adhesive. * Using shims to ensure the frame is level and plumb.Finishing Touches
Once the new frame is securely in place, complete the installation with these final steps:
* Applying caulk around the perimeter of the frame to seal any gaps and create a finished look. * Cleaning any excess caulk or adhesive. * Allowing the caulk to dry completely before using the bathroom.Choosing the Right Frame
Selecting an appropriate frame is crucial for achieving the desired aesthetic and functionality. Consider these factors:
* Material: Wood, metal, and plastic are common frame materials, each offering distinct advantages and disadvantages regarding durability, maintenance, and style. * Style: Choose a frame style that complements the overall bathroom design. * Size and proportions: Ensure the frame's dimensions are appropriate for the mirror and the bathroom space.Safety Precautions
Throughout the process, prioritize safety. Essential precautions include:
* Wearing safety glasses to protect eyes from debris. * Wearing work gloves to protect hands from sharp edges and chemicals. * Handling the mirror carefully to avoid breakage. * Disposing of old materials properly.Maintenance and Care
Proper maintenance extends the lifespan of the new frame. Key recommendations include:
* Regularly cleaning the frame with a mild detergent and a soft cloth. * Avoiding harsh chemicals that can damage the frame's finish. * Promptly addressing any signs of damage or wear.By following these steps and guidelines, replacing a bathroom mirror frame can be a successful and rewarding DIY project, significantly enhancing the bathroom's overall appearance and value.

How To Install A Mirrorchic Bathroom Mirror Frame Momhomeguide Com

Mirror Frame Diy How To Update A Basic Bathroom Our Faux Farmhouse

Bathroom Mirror Frames 2 Easy To Install Sources A Diy Tutorial Retro Renovation

How To Frame Out That Builder Basic Bathroom Mirror For 20 Or Less

Mirror Frame Diy How To Update A Basic Bathroom Our Faux Farmhouse

Diy Bathroom Mirror Frame Without Removing Clips Her Happy Home

How To Frame A Mirror

Mirror Frame Diy How To Update A Basic Bathroom Our Faux Farmhouse

Diy Stick On Mirror Frame Sawdust Sisters

Diy Bathroom Mirror Frame For Under 10 O Hayley Blog