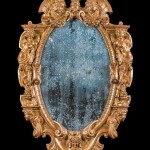
Building a Three-Way Mirror: A DIY Guide
A three-way mirror, also known as a tri-fold mirror, is a versatile and essential tool for various applications, from fashion and beauty to interior design and even healthcare settings. These mirrors are typically composed of three panels hinged together, allowing for a comprehensive view of oneself from multiple angles. While purchasing a pre-made three-way mirror is an option, creating one yourself through a DIY project can be a fulfilling and cost-effective alternative.
Constructing a three-way mirror requires basic woodworking skills and access to common tools. The following guide provides a step-by-step breakdown of the process, ensuring a successful and satisfying DIY project.
Planning and Materials
Before embarking on the construction, a thorough plan is essential. This includes determining the desired size and dimensions of the mirror, the type of wood to be used, and the number of panels. The following materials are generally required:
- Wood panels (3): The choice of wood depends on the desired aesthetic and structural requirements. Common options include plywood, MDF, or solid wood. The dimensions of each panel will determine the overall size of the mirror.
- Hinges (2): Choose hinges that are strong enough to support the weight of the mirror panels. For larger mirrors, consider using heavy-duty hinges.
- Mirror glass (3): The size of the mirror glass should match the dimensions of the wood panels. Ensure that the glass is of good quality and free from imperfections.
- Mirror adhesive: A strong and permanent mirror adhesive is crucial for securing the mirror glass to the wood panels.
- Wood glue: Use wood glue to join the three panels together.
- Screws or nails: These are used to secure the hinges to the wood panels.
- Finishing materials: Depending on the desired finish, materials such as paint, stain, or varnish may be required.
- Measuring tape, pencil, saw, drill, and screwdriver: These tools are necessary for accurate measurements, cutting, and assembling the mirror.
Mirror Panel Preparation
After gathering the necessary materials, begin by preparing the wood panels for attaching the mirror glass. Ensure that the surfaces are smooth and free of any defects or imperfections. The following steps will ensure proper panel preparation:
- Sand the wood panels using sandpaper of increasing grit levels, starting with coarse grit and gradually moving to fine grit. This will remove any roughness and create a smooth surface for attaching the mirror glass.
- Clean the sanded surfaces thoroughly using a damp cloth to remove any dust or debris. This will guarantee a clean and adhesive-ready surface.
- Apply a coat of primer to the wood panels. This will provide a smooth and uniform surface for the adhesive, improving its adhesion to the wood.
- Allow the primer to dry thoroughly before proceeding to the next step.
Mirror Glass Attachment
Once the wood panels are prepared, carefully attach the mirror glass using the chosen mirror adhesive. Ensure that the mirror is positioned correctly and centered on the panel. The following steps guide the attachment process:
- Apply a thin, even layer of mirror adhesive to the back of the mirror glass. Use a spreader or putty knife to distribute the adhesive evenly across the surface.
- Carefully position the mirror glass onto the prepared wood panel, ensuring that it is centered and aligned correctly.
- Apply gentle pressure to the mirror glass, using a soft cloth or a rubber roller, to ensure that the adhesive makes good contact with both the mirror and the wood panel.
- Allow the adhesive to dry completely according to the manufacturer's instructions. This may require several hours or even overnight.
- Repeat the process for the remaining two mirror panels.
Panel Assembly and Hinging
With the mirror glass attached to all three panels, the next step involves assembling the panels and attaching the hinges. Ensure that the hinges are positioned correctly and securely attached to the panels.
- Apply a generous amount of wood glue to the edges of two of the wood panels. This will create a strong and durable bond between the panels.
- Align the glued edges of the panels and clamp them together. Use clamps to ensure that the panels are tightly joined and held in place while the glue dries.
- Allow the glue to dry completely, following the manufacturer's instructions. This may require several hours or overnight.
- Once the glue is dry, attach the hinges to the panels. Position the hinges towards the edges of the panels, ensuring that they are aligned properly.
- Secure the hinges to the panels using screws or nails. Ensure that the screws or nails are long enough to penetrate the wood and provide a secure attachment. Repeat the hinge attachment process for the remaining two panels.
Finishing Touches
After the panels are assembled and hinged, the final step involves applying finishing touches to enhance the appearance and durability of the three-way mirror. This step might involve painting, staining, or varnishing the wood panels, depending on the desired aesthetic.
- If painting, apply a coat of primer to the entire surface of the wood panels. Allow the primer to dry completely before applying paint.
- Apply multiple coats of paint, allowing each coat to dry thoroughly before applying the next. This will create a smooth and even finish.
- If staining, apply the stain evenly to the wood panels. Use a brush or cloth to distribute the stain evenly across the surface.
- Allow the stain to dry completely before applying a sealant. A sealant will help protect the stain from scratches and wear.
- If varnishing, apply a coat of varnish to the wood panels. Use a brush or spray gun to apply the varnish evenly across the surface.
- Allow each coat of varnish to dry completely before applying the next.
Safety Precautions
While constructing a three-way mirror can be a rewarding DIY project, certain safety precautions must be taken to prevent accidents and injuries. Glass is fragile and sharp, and it is essential to handle it with care. Wear safety glasses to protect your eyes from flying glass shards. When using power tools, ensure you wear appropriate protective gear such as gloves and hearing protection. Also, work in a well-lit and ventilated area to minimize risks.

How To Make A Tutorial Diy Three Way Mirror Sewing

Cbhm Three Way Mirror For B Bedroom Diy Room

Do It Yourself Ladies Diyl 3 Way Mirror All You Need 1 Power Drill Long Mirrors 4 6 Door Hinges Some S Obvi Remodel Bedroom Diy Home

Pin By Christina Jones On Done It Three Way Mirror Diy Wardrobe

Tri Fold Mirror Love This Trifold Room Diy

Diy Three Way Angled Mirror

Simple Diy 3 Way Mirror Area Perfect For Getting Ready Bedroom Ideas Small Rooms Cozy Room

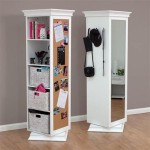
Full Length Three Way Rolling Mirror Diy

3 Way Mirror Trifold For Self Hair Cutting And Styling Diy Haircut Tool Com

3 Way Mirror Adjustable Diy Haircut Your Head At Home Ca