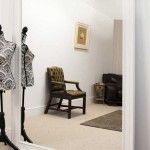
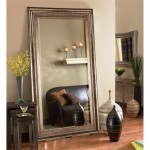
Wood Framed Mirror DIY
Creating a custom wood-framed mirror offers a rewarding project for both novice and experienced DIY enthusiasts. This endeavor allows for personalized design choices, material selection, and significant cost savings compared to purchasing a pre-made framed mirror. The following guide outlines the steps required to construct a basic wood-framed mirror, allowing for customization based on individual preferences and skill levels.
Materials Required:
The fundamental materials required for this project include a mirror, wooden boards for the frame, adhesive, measuring tools, cutting tools, and finishing supplies. The specific type of wood, adhesive, and finish can be tailored based on the desired aesthetic and budget. Popular wood choices include pine, oak, and cedar, each offering distinct grain patterns and durability. Mirror adhesive, specifically designed for securing mirrors to substrates, is essential. Basic woodworking tools such as a measuring tape, saw (hand saw or miter saw), and sandpaper are crucial. Finishing supplies might include wood stain, paint, or a clear sealant, depending on the desired look.
Step 1: Mirror Measurement and Frame Design:
Accurate measurement of the mirror is the foundational step. Using a measuring tape, record the precise length and width of the mirror's surface. These measurements dictate the internal dimensions of the wood frame. The frame's width is a design choice, impacting the overall aesthetic. Sketching the frame design on paper can help visualize the final product and confirm measurements. Consider the desired joinery method for the frame corners, such as mitered corners, butt joints, or more complex joinery for advanced woodworkers.
Step 2: Wood Preparation and Cutting:
Select straight, dry wooden boards with minimal warping or imperfections. The boards should be slightly wider than the desired frame width to allow for adjustments and a clean finish. Using the previously recorded measurements and the chosen frame width, calculate the required length of each frame piece. Mark these measurements on the wood using a pencil and measuring tape. Cut the wood pieces according to the marked lines, ensuring precise cuts to achieve a well-fitted frame. A miter saw is recommended for angled cuts required for mitered corners, while a hand saw can be used for straight cuts.
Step 3: Frame Assembly:
Once the frame pieces are cut, they need to be assembled into a frame. For mitered corners, apply wood glue to the angled edges and clamp the pieces together, ensuring tight joints. For butt joints, glue and clamp the ends of the boards together. Allow ample drying time for the glue according to the manufacturer's instructions. Reinforce the joints with finishing nails or brads for added stability, especially for larger frames. Countersink the nails and fill the holes with wood filler for a seamless finish. Sand the entire frame surface smooth, removing any excess glue or imperfections.
Step 4: Finishing the Frame:
The choice of finish dramatically affects the final appearance of the mirror. Apply a wood stain to enhance the natural grain of the wood and add color. Alternatively, paint can be used for a solid color finish. Multiple coats might be necessary for optimal coverage and color saturation. Allow each coat to dry thoroughly before applying the next. Once the desired color is achieved, apply a clear sealant to protect the frame from moisture and damage. The sealant can be a matte, satin, or gloss finish, depending on the preferred sheen.
Step 5: Mirror Attachment:
Clean the back of the mirror and the frame's inner surface to ensure proper adhesion. Apply mirror adhesive to the back of the frame, following the manufacturer's instructions for application and coverage. Carefully position the mirror onto the adhesive, ensuring it is centered within the frame. Apply even pressure to the mirror surface to secure the bond. Use mirror clips or other appropriate supports to hold the mirror in place while the adhesive cures fully. Allow adequate curing time as recommended by the adhesive manufacturer.
Step 6: Hanging Hardware and Installation:
Once the adhesive has cured, install appropriate hanging hardware on the back of the frame. D-rings or wire hangers are common choices. Consider the weight of the framed mirror when selecting hardware. Mark the desired location for the mirror on the wall and install the corresponding hardware, such as wall anchors and screws. Hang the framed mirror on the installed hardware, ensuring it is securely mounted.
Customization Options:
This basic framework offers numerous customization options. Consider adding decorative elements like molding, inlay, or carving to the frame for a more ornate appearance. Experiment with different wood species and stains to achieve unique color combinations. Incorporate different joinery techniques for a more complex and visually appealing frame structure. The possibilities for customization are limited only by individual creativity and skill level.

Diy Farmhouse Wood Frame Mirror She Gave It A Go

Diy Farmhouse Wood Frame Mirror She Gave It A Go

Diy Wood Framed Bathroom Mirror Christina Maria Blog

Diy Rustic Wood Frame Mirror Amanda Katherine

How Build A Wooden Diy Mirror Frame For Entryway Thediyplan

Wood Mirror Diy Shanty 2 Chic

Diy Wood Mirror Frame Framed

Mirror Frame Diy How To Update A Basic Bathroom Our Faux Farmhouse

Diy Framed Mirror Jaime Costiglio

Diy Reclaimed Wood Frames The Space Between